
SharePoint doesn’t officially support timer based workflows out of the box. Various hacks can be instigated to attempt to achieve this, and the most common one is to set up looping workflows that call other workflows. The drawback of this approach is that normally, at some point, the workflow looping breaks down and a user will therefore need to monitor, detect failure, clean things up, and then kick everything off again. True timer-based workflows can be approximated to some extent by SharePoint’s Information Management Policy options.
Information Management Policies
First let’s talk through SharePoint’s Information Management Policy capabilities, and then we’ll go into an example of how to abuse it to establish timer-based workflow execution.
Information management policies (IMP) offer control over who has access to data, for how long, and when it expires. In SharePoint 2007, IMPs could only be specified at the content-type level. In SharePoint 2010, the ability to specify the same at list/library level was added. IMPs are most notably associated with retention policies – e.g. when do we archive or delete an item – but they are not limited to this. Essentially, they provide a trigger (limited options) based on some event and then one or more policy features (what SharePoint calls the rules) are executed. These may be something simple like moving an item to the recycle bin, or something slightly more interesting like kicking off a workflow.
Something to note at this point is that applying IMPs at the list/library level will break any policies associated with any content types the library is linked to. Use of this feature must therefore be undertaken with due consideration to the wider implications it may introduce.
Another point to note is that retention policy behaviour relies on two timer jobs. The first is the Information Management Policy job, and this is responsible for evaluating the IMP rules across the farm. The second is the Expiration Policy job, which is responsible for executing the actions associated with the policies. By default, these jobs both only run once a week. You can change the period with which they executes to days, hours or minutes if necessary – but increasing the period can have dramatic effects on a production server capability because it applies to all the IMPs that are defined, not just the ones in a particular site collection or list/library.
Configuring SharePoint
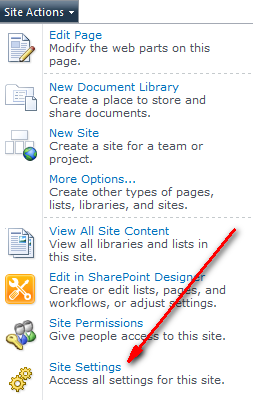
First of all, we need to make sure SharePoint is configured to enforce IMPs. View Site Settings from any site in the site collection you are targeting.
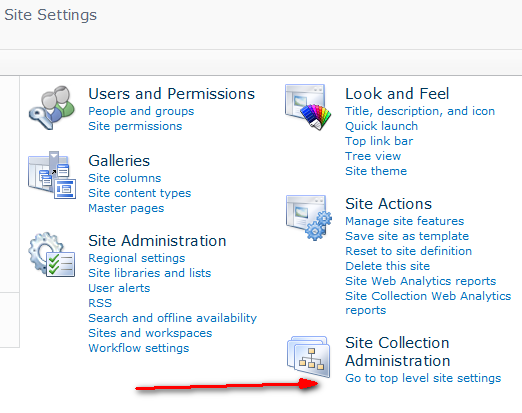
Under the Site Collection Administration heading, click the ‘Go to top level site settings’ option.
Under the Site Collection Administration heading again, but this time that of the site collection settings, choose the ‘Site collection features’ option.
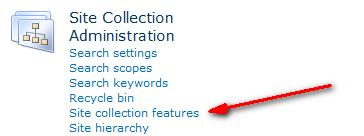
Locate the ‘Library and Folder Based Retention’ service, and activate it (if not already done.)
The next step assumes you’ve already authored whatever workflows you want to call periodically.
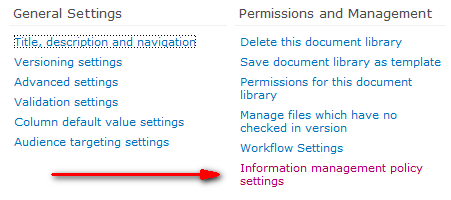
Head back to the site containing the list or document library we want to apply the timer-based behaviour to. View the List Settings (or Library Settings, if a document library is being targeted), and then click on the ‘Information management policy settings’ option under Permissions and Management.

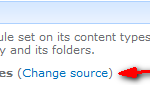
By default, the retention policy is inherited from the content type, but we can change that by clicking on the ‘Change source’ link under the Library and Folder Based Retention section.
Now we can change the retention policy to relate to ‘Library and Folders’.
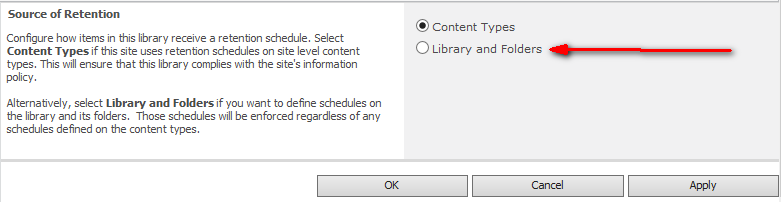
This will allow us to specify IMPs that apply only to the current document library. The policy features are also referred to as retention stages in this case, just to confuse the matter. We can define one or more retention stages and apply the changes.
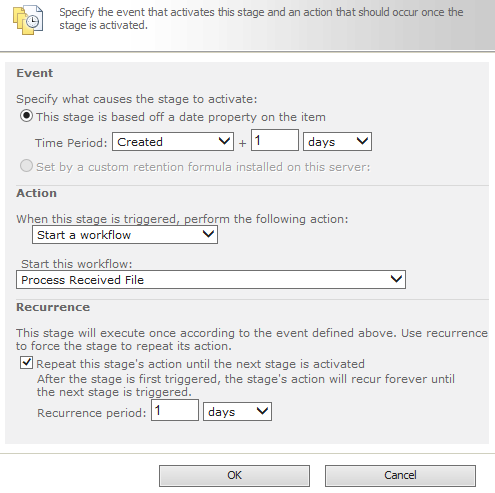
We want a workflow to run when a retention policy applies. We could add a retention stage definition, setting it up to kick off a day after an item is created or modified and then recur every day after that (using the tick-box in the Recurrence section.)
So, the problems we now have is that our shortest duration is a day, and the timer jobs that control and execute retention policies only run once a week by default. Through trial and error it may be possible to reduce the job periods to a level where this approach may be used, but special care should be taken not to adversely affect server (farm) performance and it should be used sparingly due to the potential performance impacts. If the jobs’ recurring schedules can be reduced to hours or less without impacting performance, then they could be used in conjunction with a custom column (e.g. a date/time column called Last Checked) to force workflow execution more regularly.
To get around the once a day issue, we could add a new metadata field that holds a date/time value we can control more easily and then use that as the trigger for retention events instead of the ‘Created’ column.
Let’s say we’ve manage to get the retention job timers running every 30 minutes without any noticeable degradation in server performance. We set up a retention stage that triggers a day after a custom ‘Last Checked’ column we’ve added which holds a date/time value. Now, when a new item is created, we include a workflow that sets an initial ‘Last Checked’ value of (Created – 23 hours). This will cause the retention policy to trigger approximately an hour after the item is added. When it runs, we set our new ‘Last Checked’ value to (Last Checked + 1 hour) and it will run again in another hour’s time. We’ve now got a timer-based workflow that runs every hour.
We can alter the recurring schedule of the timer jobs via SharePoint’s Central Administration console. From the main page, choose Monitoring from the left hand menu.
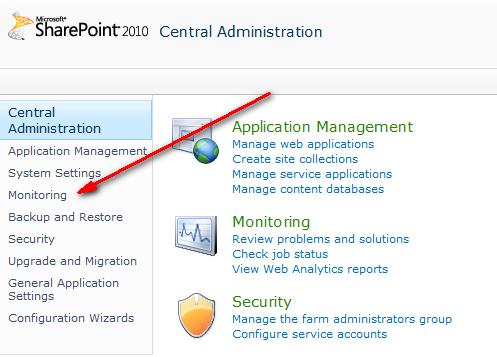
Then ‘Review job definitions’ under the Timer Jobs section.
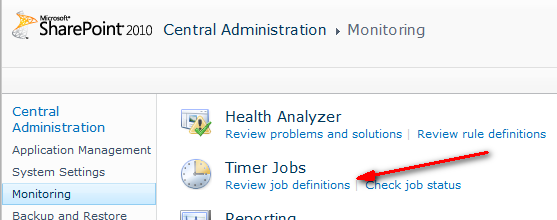
The two jobs are called ‘Information Management Policy’ and ‘Expiration Policy’ respectively and we can alter their settings by clicking on them, making the required changes and then applying them.