Converting a file from DOCX to another format (such as PDF) had long been a pain in SharePoint and usually led to resorting to using Word Automation Services (WAS). Fortunately, modern SharePoint (Online) and the Microsoft Graph API mean you can do it with a few Web API calls.
The most common way to grant access for most developers will be Microsoft 365 (MS365) and Azure Active Directory (AAD). If, instead, you want to use a SharePoint App Registration then skip to the next section instead. (FYI: using a SharePoint app registrationused to be a way of overcoming AAD requiring full access to all sites in the tenancy but AAD’s recently released Sites.Selected scope allows you finer grain permissions than before.)
Before you can access the Graph API programmatically, you need to grant it access to your Microsoft 365 Tenancy. You do this using the Azure Portal tools and can start by going to https://portal.azure.com.
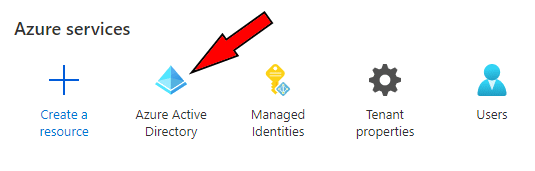
The home screen layout is likely to change over time but at the time of authoring this article, a section of it looked something like this:
Find and select the Azure Active Directory (AAD) tool option.
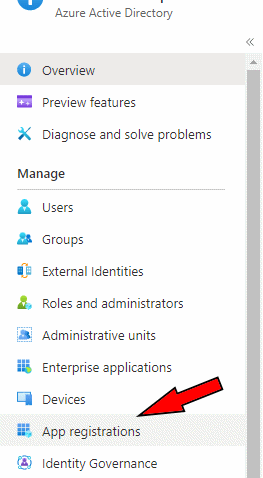
On the AAD tool’s main page, find the ‘App Registrations’ option in the left-hand menu and select it.
On the App Registrations screen, select the New Registration option.
On the new registration form, type in a friendly name that will help identify the app (e.g. Document Converter), and select the most appropriate account types option (which is likely to be the organizational directory only in most cases).
Click the Register button at the bottom of the page to add the new registration.
The app registration details will then be displayed. Make a note of the Application (client) ID and Directory (tenant) ID as we will need them later.
Next we need to create a secret key to use when authenticating. Click on the ‘Add a certificate or secret’ link button.
We’re using the client credentials (client ID and secret/password) here so make sure the ‘Client secrets’ tab is displayed and then click on the New client secret button.
Enter a user-friendly description for the client secret (e.g. DocConverterApp), select the appropriate expiry period, and then click the Add button.
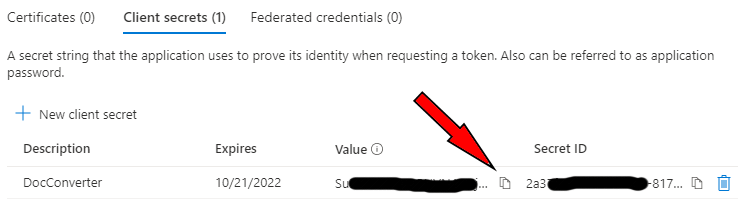
IMPORTANT: make sure you don’t navigate away from the page that is displayed until you have copied the ‘Value’ for the new secret key as it won’t be possible to copy it on future visits to the key details page.
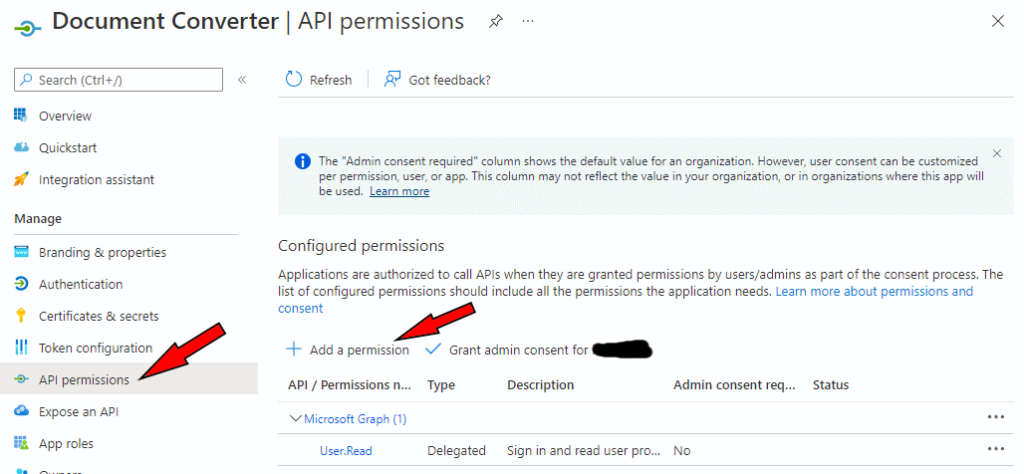
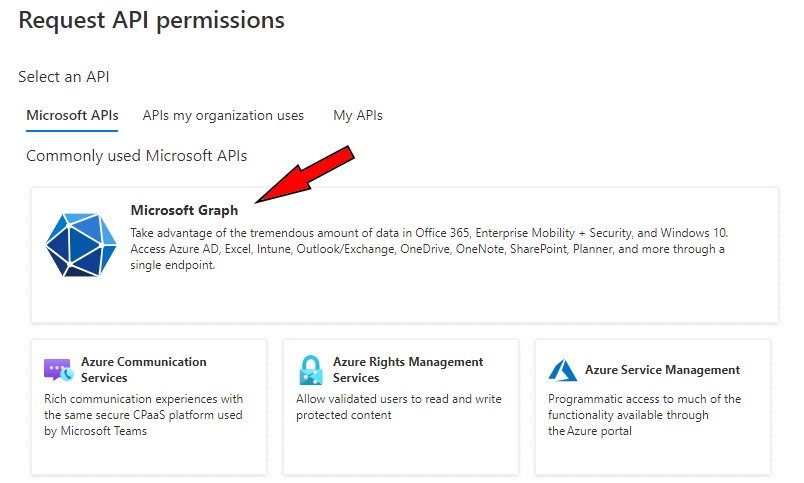
Finally, you need to give the app registration some permissions. So, select the API permissions left-hand menu option.
Select Microsoft Graph as the API being targeted.
We now need to select all the permissions the app will need. This is likely to be access to sites and files on SharePoint, in this case…
You may not need Sites Read-Write access, if the app registration is only being used to convert documents, so adjust your permissions to meet your requirements.
Click the Add permissions button to apply the changes.
You may need to get the permissions approved by a Microsoft 365 administrator. If so the permissions table will look similar to this:
Access will not be available to the app registration until this is authorised.
Creating a SharePoint App Registration
You only need to follow these steps if you prefer to use a SharePoint Online (SPO) app registration instead using AAD.
UPDATE: SPO app registration is now out of support, having been retired on November 27th 2023. See the message copied from Microsoft’s website below.
If you are only accessing SharePoint Online with your app, then you can create a SPO-only app registration and permissions. This allows finer grain permissions than AAD allows, being able to set the scope of access at site level.
First, navigate to the site you want to grant access to and then edit the relative page URL in the browser’s address-bar so it ends with:
A typical full URL might look something like this (where you need to substitute ‘tenancy-name-here’ and ‘sites/yoursubsite’ with your own site connection details):
On the new registration form, click the Generate button to auto-generate a client ID and secret key value, and fill out the remaining fields with suitable data. NOTE: make sure you make a note of the Client ID and Secret Key data before completing the app registration.
The app domain and redirect URI are only relevant if using interactive login, etc. We’re not in this case, as we will be doing headless service calls, so setting ‘localhost’ and ‘https://localhost’ is fine as the values won’t be used. Click the Create button.
Once the app registration has been created, we still need to grant permissions to the app. We need to navigate to another page to do this (replace the placeholder parts of the URL with your own tenant and site details):
Paste the Client ID from your app registration into the ‘App Id’ form field and click the Lookup button. It should retrieve the app principal’s details so you know the lookup worked.
For the permissions, you can copy and paste the XML below to grant full access permissions on the current site to the app:
If your app doesn’t require full-control access and you want to adopt least privilege best practice, you could use any other defined permission level on the site (e.g. Contribute, Read) instead.
Getting an Authentication Token
Now that we are up and running with the required app permissions, its time to get an authentication token (Bearer token) we can use for the document conversion.
We’ll use Postman to step through the process but the same approach can be undertaken programmatically in code.
First, we need to get an authentication bearer token from Microsoft using their federated login service. (We’ll cover both AAD and SPO authentication mechanisms here.)
SharePoint-Based Authentication
SharePoint still uses an older Microsoft authentication mechanism that has been deprecated on AAD but is still available on SPO and, at the time of writing, Microsoft have no immediate plans to retire.
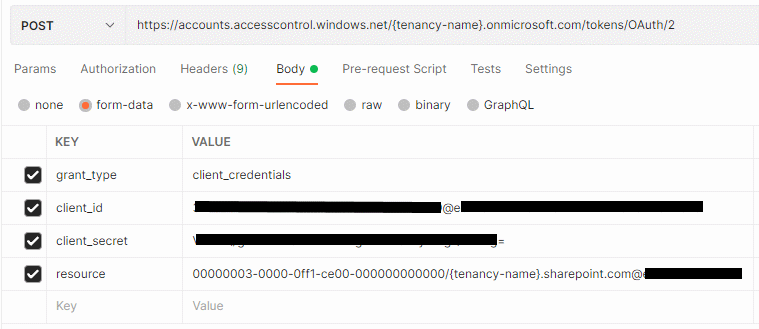
Enter a URL of the form:
https://accounts.accesscontrol.windows.net/tenantIdHERE/tokens/OAuth/2
e.g.
https://accounts.accesscontrol.windows.net/fabrikam/tokens/OAuth/2Code language:plaintext(plaintext)
Enter the form data for your app registration. Note that the client_id field is of the form ‘ClientID@TenantID’ in this case, not just the Client ID alone.
Also, the resource field is a well-known MS Graph API identifier and needs to be properly formatted of the form:
00000003-0000-0ff1-ce00-000000000000/{tenancy-name}.sharepoint.com@{tenant-id}
e.g.
00000003-0000-0ff1-ce00-000000000000/fabrikam.sharepoint.com@8555b51d-6f6d-42cd-843c-daa1c25fd5eeCode language:plaintext(plaintext)
When the request is executed, a JSON formatted response should be returned including an ‘access_token’ property containing the bearer token, and (optionally) a ‘refresh_token’. Copy these values for later use.
MS365 (AAD) Authentication
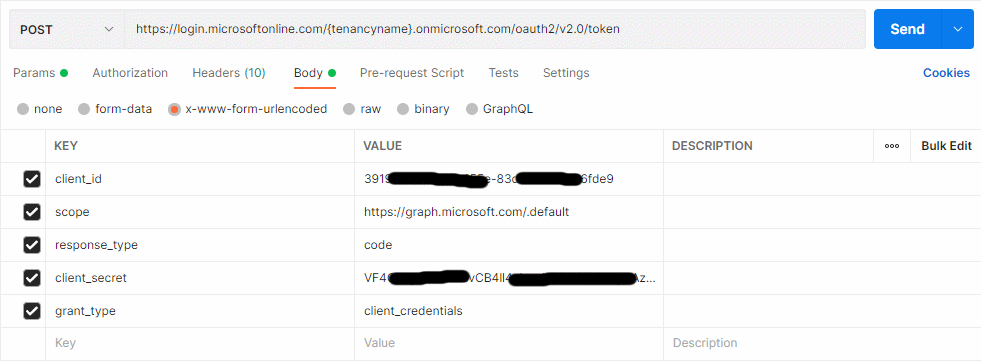
Create a new request tab in Postman, and set the HTTP method to POST.
Enter a URL of the form:
https://login.microsoftonline.com/{tenancy-name}.onmicrosoft.com/oauth2/v2.0/token
e.g.
https://login.microsoftonline.com/fabrikam.onmicrosoft.com/oauth2/v2.0/tokenCode language:plaintext(plaintext)
As the screen-shot above illustrates, the request expects a form in the message body. Use the above settings, substituting the client_id and client_secret values for those that are associated with your app registration.
When we execute the request, a JSON formatted response should be returned including an ‘access_token’ property containing the bearer token that can be used to authenticate against the Graph API, and (optionally) a ‘refresh_token’ that can be used to refresh the authentication token period periodically if you require this. Copy these values for later use.
Performing the Graph API Calls
Create another request in Postman. This time we’re going to query the document libraries on the SharePoint site we’re targeting.
Enter a URL of the form:
https://graph.microsoft.com/v1.0/sites/{tenancy-name}.sharepoint.com:/{sub-site}:/drives
e.g.
https://graph.microsoft.com/v1.0/sites/fabrikam.sharepoint.com:/sites/docconv:/drives
or...
https://graph.microsoft.com/v1.0/sites/fabrikam.sharepoint.com:/root:/drivesCode language:plaintext(plaintext)
Add an authorization header with a value of “Bearer {auth-token}”, where you paste the token value you requested earlier instead of {auth-token}.
When we execute the request, details of all the document libraries on the target site will be returned. For example:
Copy the ‘id’ property. Use it in the following URL format to get summary details of the items in the document library (via another Postman request):
https://graph.microsoft.com/v1.0/drives/{drive-id}/root/children
e.g.
https://graph.microsoft.com/v1.0/drives/b!sToD2Dr_Ik6YboUAGCFhK9CwVKbec_M1GrYaX99EkGs1oWMXzrBkHo3EOMBxT5TE/root/childrenCode language:plaintext(plaintext)
Alternatively, you can search for a specific item by specific property name but we’re just getting all items for convenience in this worked example.
Identify the document (item) that needs to be converted and get its ‘id’ property. Once we have the item ID we can request the document conversion in another request in Postman:
https://graph.microsoft.com/v1.0/drives/{drive-id}/items/{item-id}/content?format=pdf
e.g.
https://graph.microsoft.com/v1.0/drives/b!sToD2Dr_Ik6YboUAGCFhK9CwVKbec_M1GrYaX99EkGs1oWMXzrBkHo3EOMBxT5TE/items/013X2FI3BKBGZMAN6RQYBLC5ZVCR738KVD/content?format=pdfCode language:plaintext(plaintext)
That’s it. The final query will download the converted PDF file.